
This walkthrough takes you from an empty dashboard to a sent invoice with a working pay link in about five minutes. It assumes you've already created your account and added your business details and UPI/bank.
1. Add a customer
- 1Open Customers (in the left menu, or the Customers tab on a phone) and click New customer.
- 2Enter the Customer name and Phone number (both required). If the customer is GST-registered, add their GSTIN; a valid GSTIN fills in the State for you. You can also add an email, an address and Payment terms in days.
- 3Under Notification preferences, keep Send WhatsApp, Send SMS and Send Email switched on for the ways you'll send invoices, then click Add customer.
2. Create the invoice
- 1Click New Invoice in the top bar. On a phone, tap Invoice on the floating button.
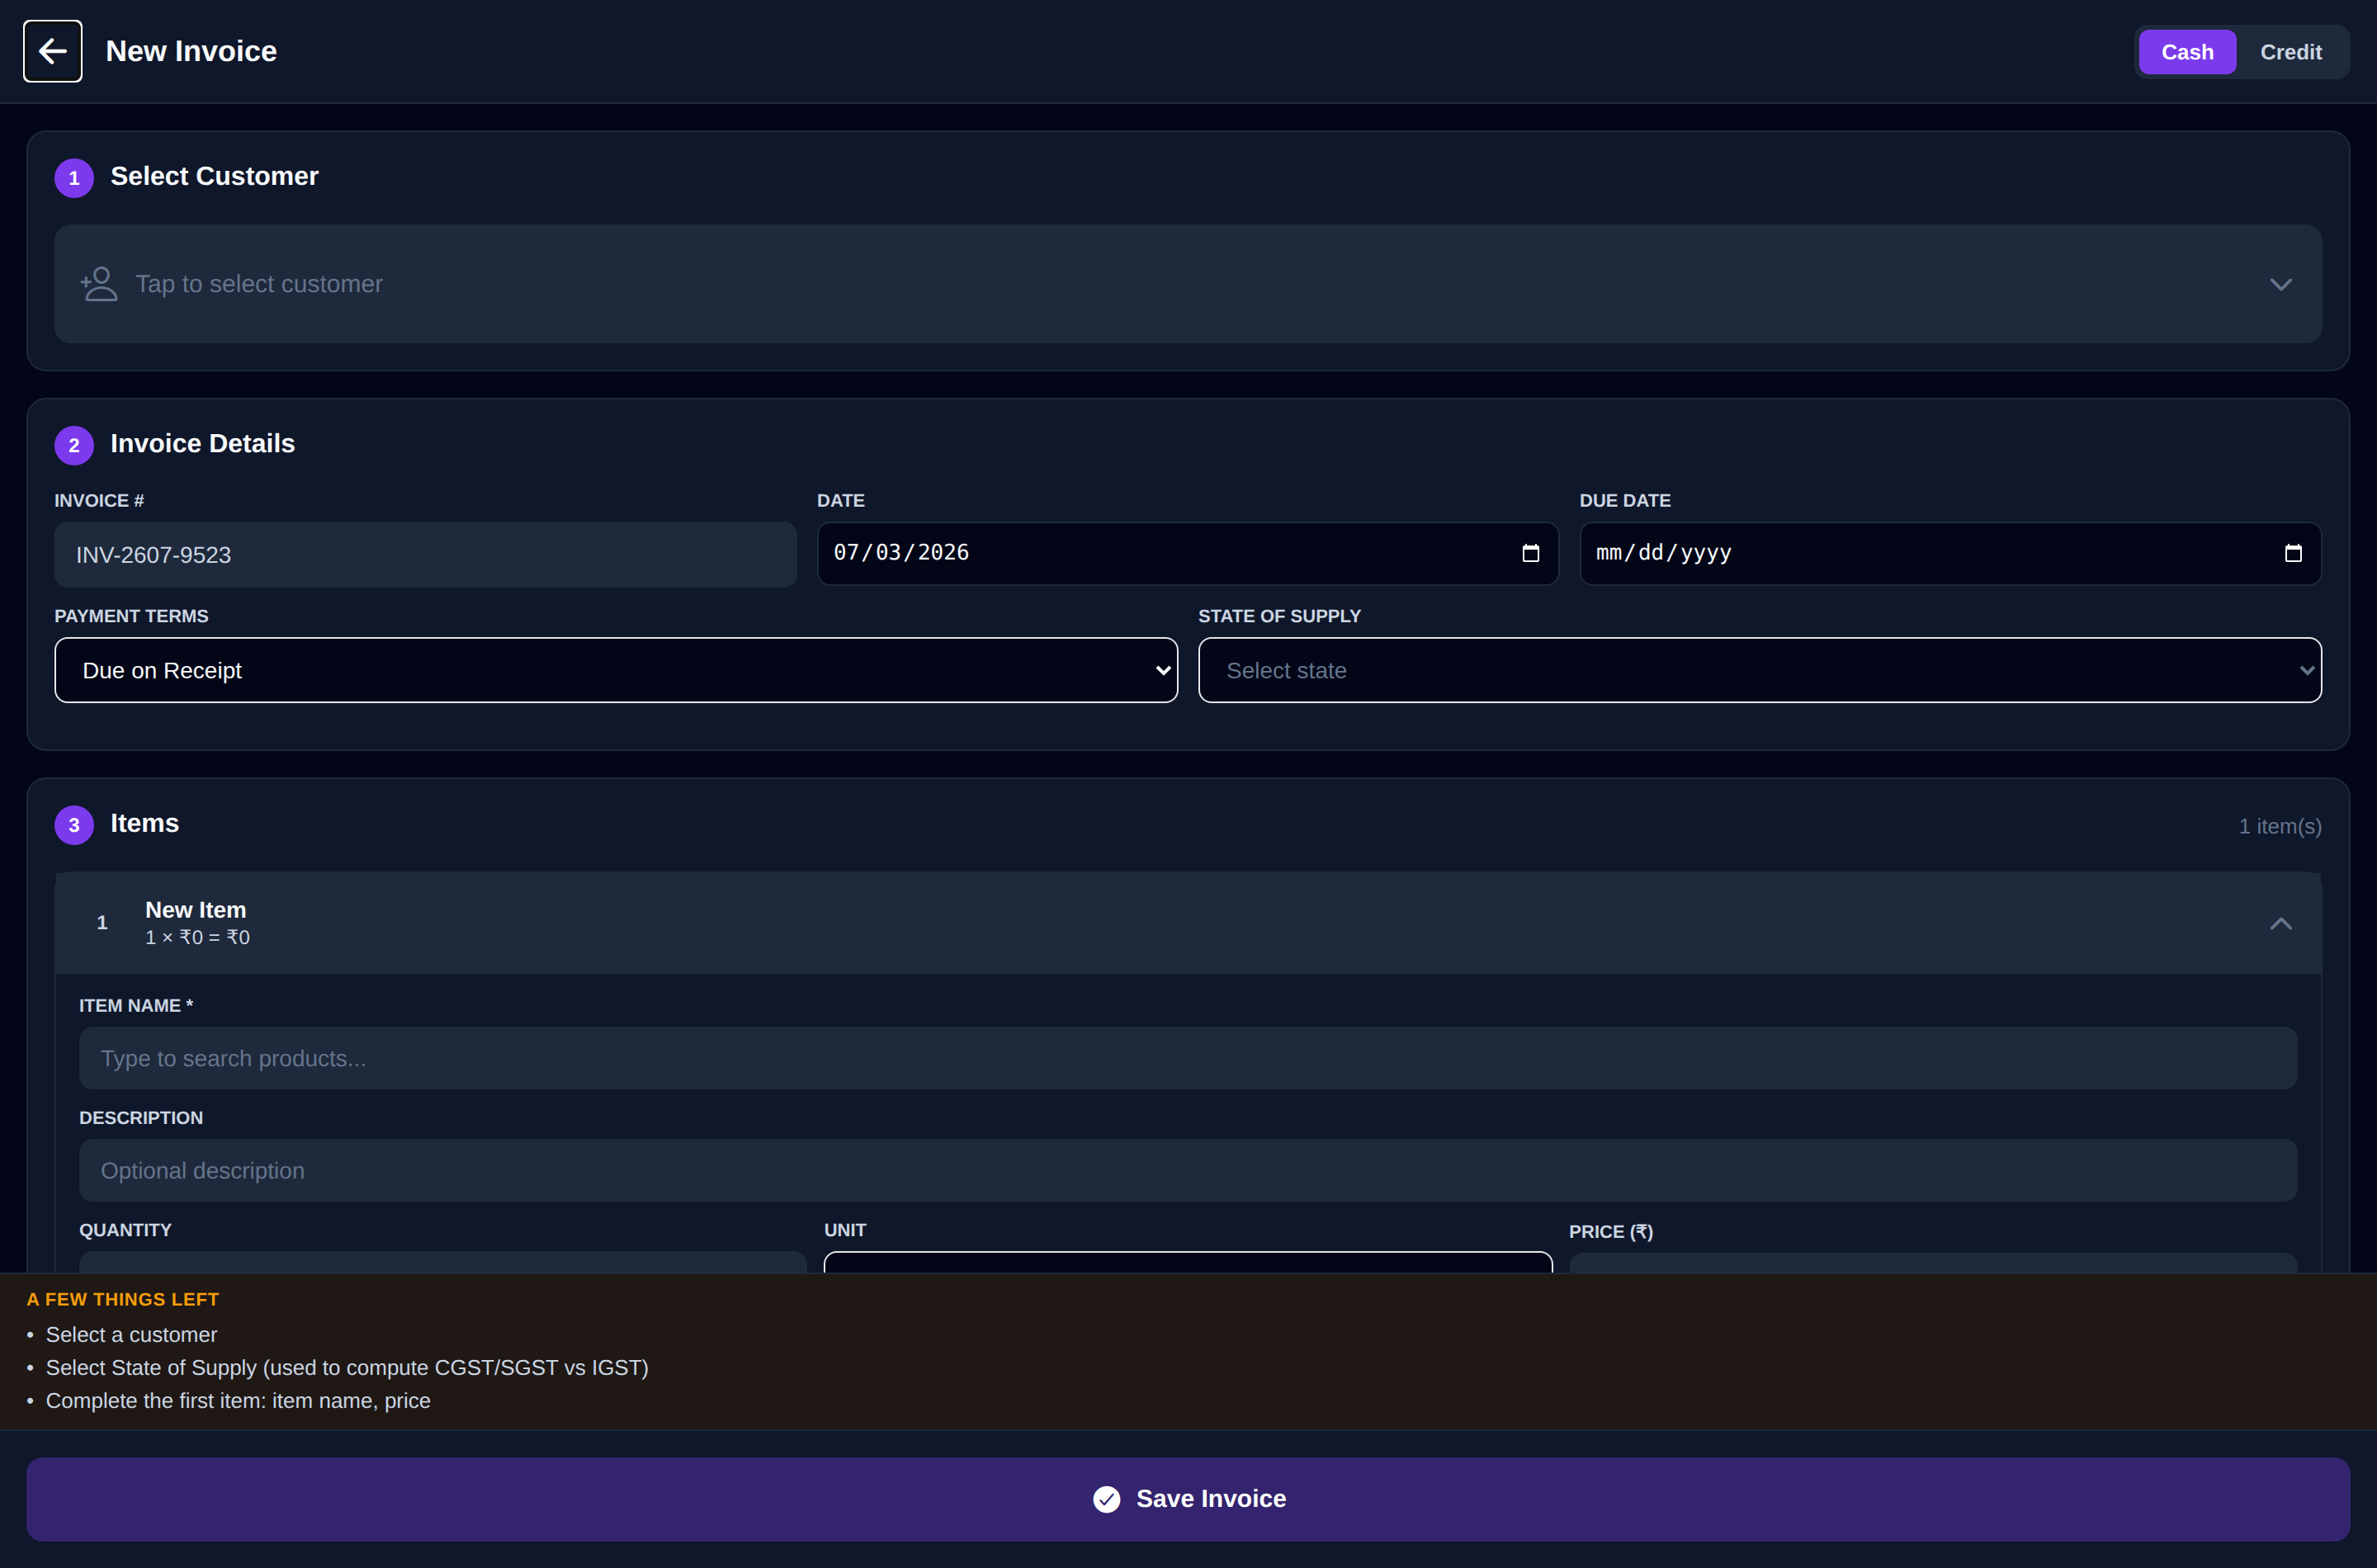
- 2Under Bill to, pick your customer. The Place of supply fills in from their state, which decides between CGST + SGST (the same state as your business) and IGST (a different state). Their payment terms set the Due date.
- 3Leave Invoice # blank to use the next number automatically, for example
INV-2026-0001. - 4Under Line items, start typing an item. Pick it from your Product Catalog or type a new one, then fill in HSN/SAC, Qty, Rate and the GST rate. Click Add item for more lines.
- 5Check the totals, and switch on Round off if you want a whole-rupee total. On a wide screen, the Live preview beside the form shows the invoice as you type; switch it between Tax invoice and Thermal.
- 6Click Save & share, or Save draft to finish it later. If the header says something like 3 things left, click it to see what's still missing, such as the place of supply.
INV-2026-0001, INV-2026-0002 and so on, and no number is ever used twice. Leave Invoice # blank and InvoiceKaro takes the next free number, or type your own (up to 16 characters).3. Send it
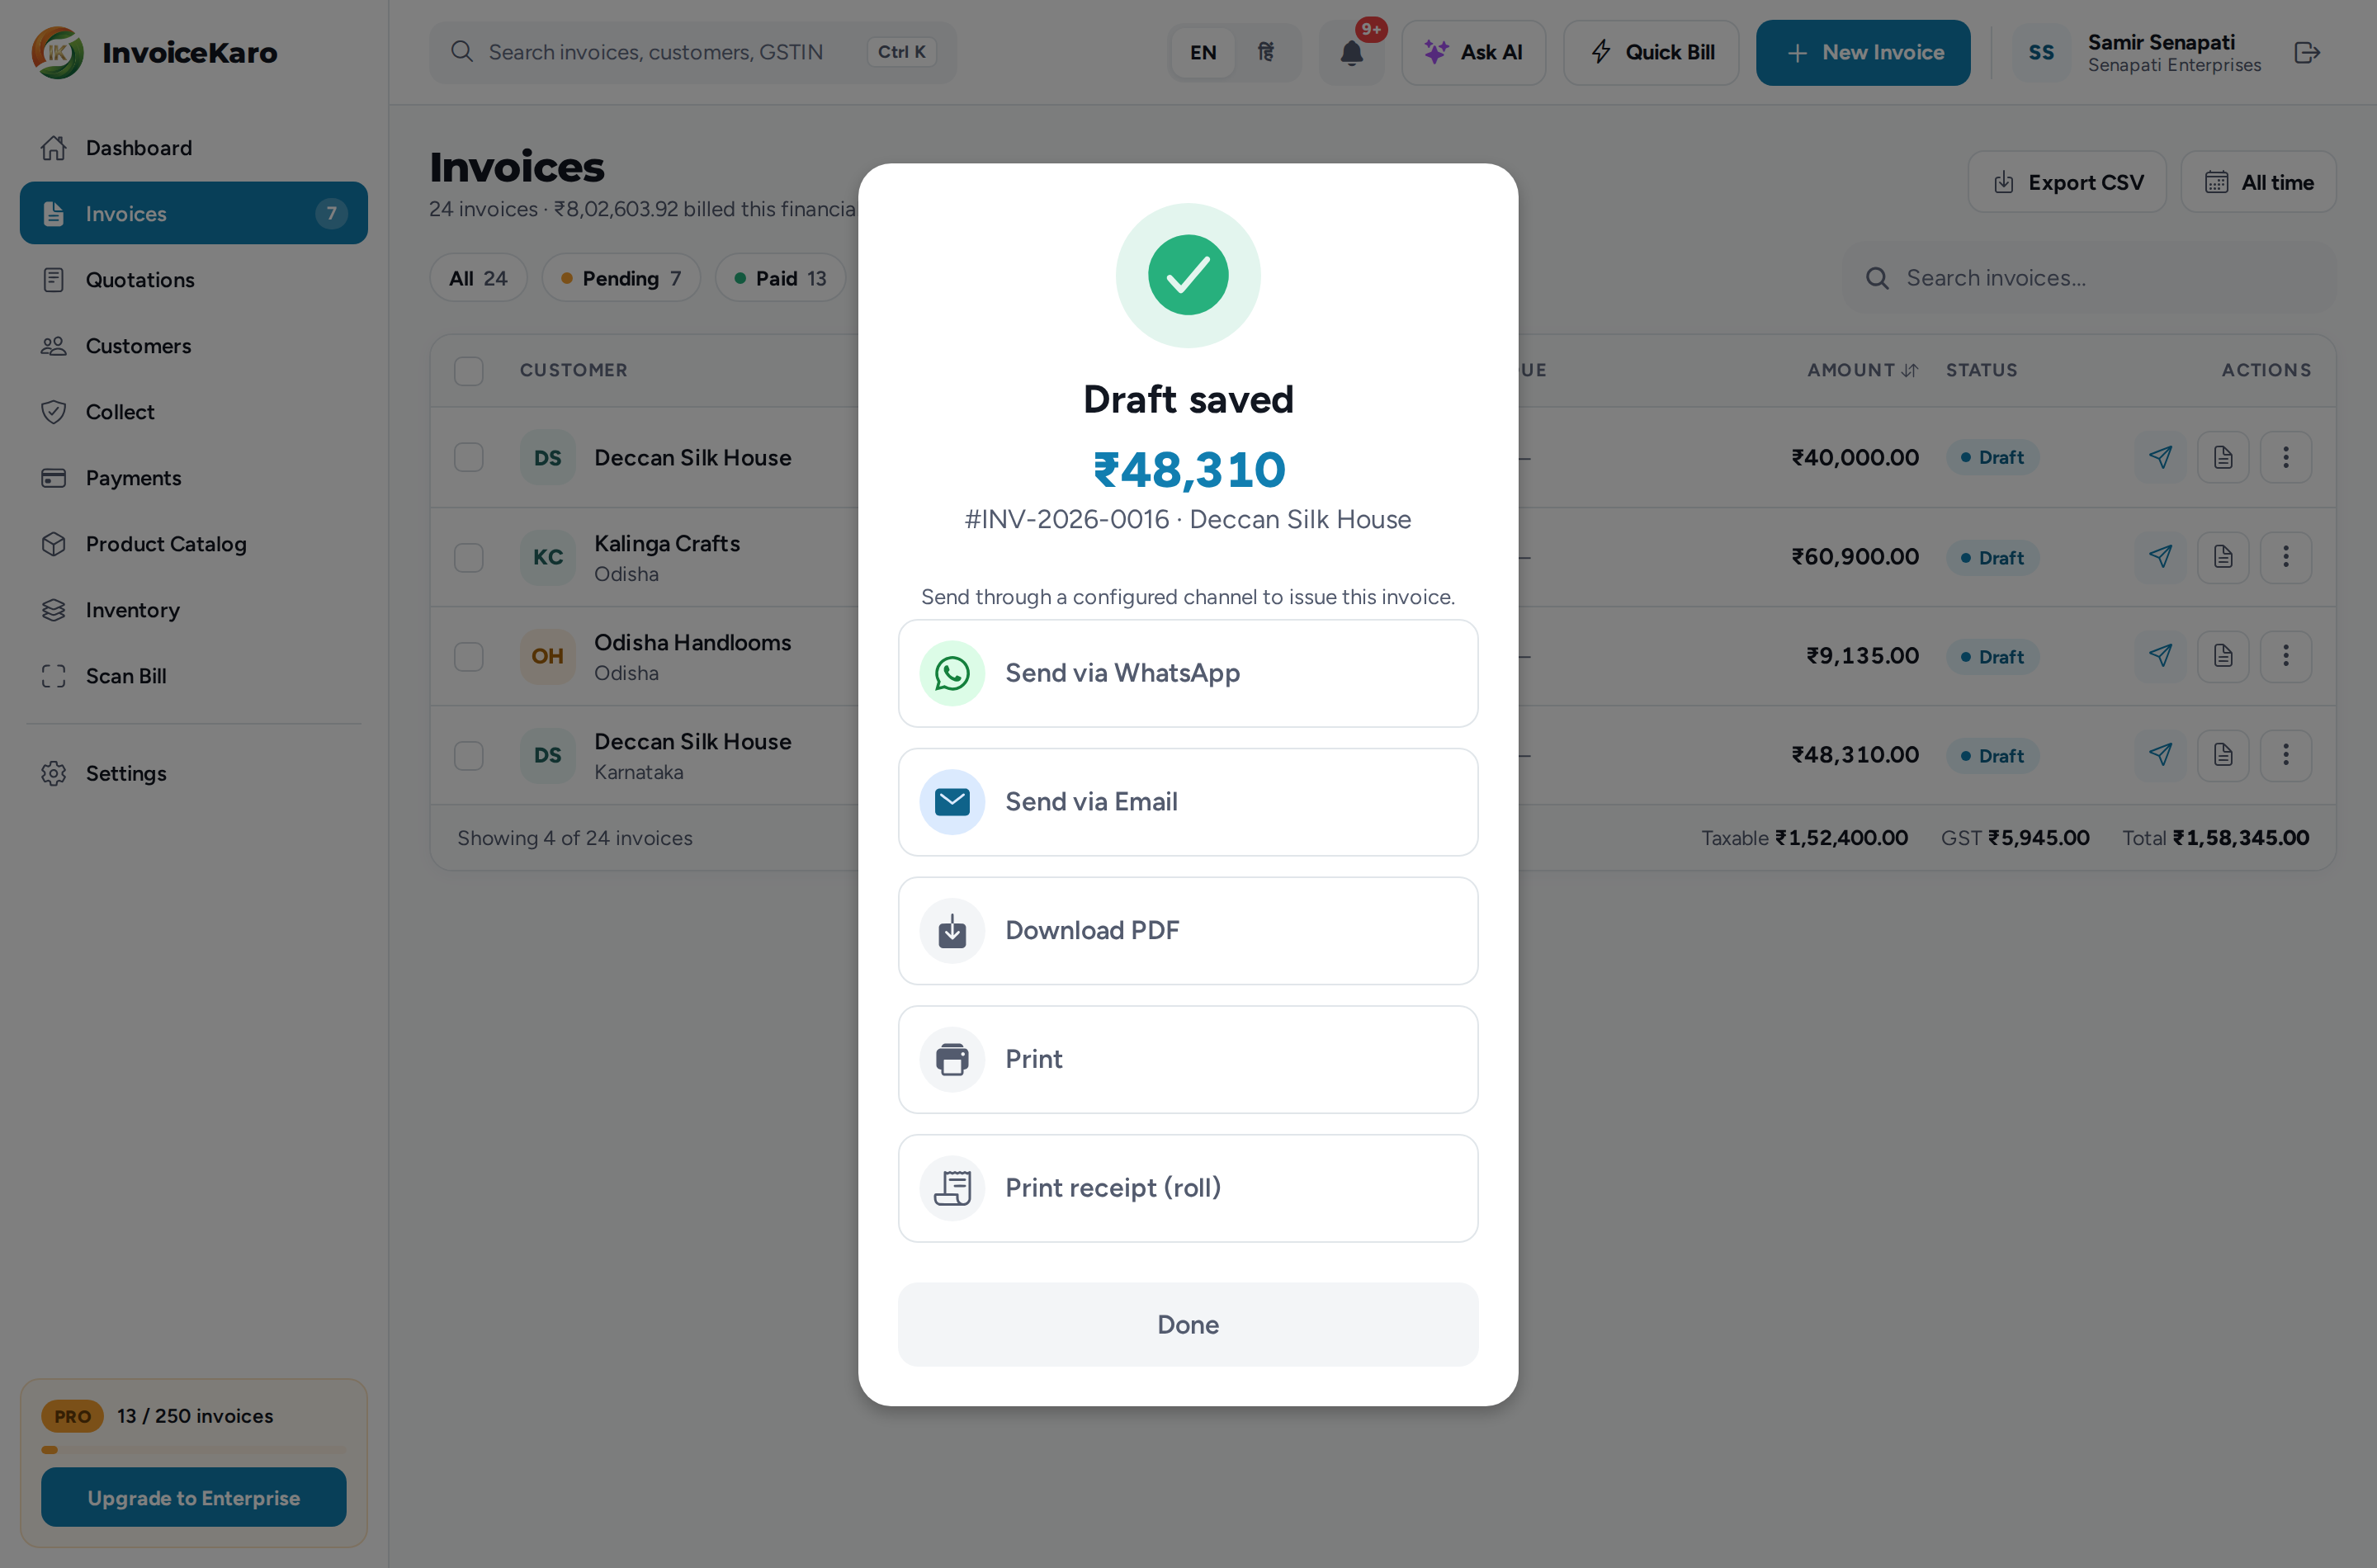
Every new invoice starts as a draft. After Save & share, a Draft saved window gives you these options: Send via WhatsApp, Send via Email, Download PDF, Print and Print receipt (roll).
- 1Choose Send via Email to send the invoice PDF and pay link to the customer's saved email address. From the invoice list, Send invoice can also use SMS when the customer has enabled it. The current Send via WhatsApp option sends an alert without the link; that alert alone does not issue a draft.
- 2Successful delivery of the invoice or pay link issues the invoice. It moves out of Drafts, counts in your receivables and GST figures, and can no longer be edited, so check it before you send.
4. Get paid
- 1Your customer opens the link and sees the invoice. They pay by scanning your UPI QR, by tapping the button that opens their UPI app, or by bank transfer. The money goes straight into your account.
- 2When it arrives, open the invoice from Invoices, click Mark as paid and confirm. This records the payment and closes the invoice.
- 3The dashboard and Payments update straight away.
To share the pay link yourself (in a chat, say), open the ⋯ menu on an issued invoice and choose Copy pay link. See Pay links.
Selling over the counter? Use Quick Bill
For walk-in customers you don't need the full invoice form. On a phone, open More → Quick Bill. On a computer, use More → Quick Bill after choosing a business type, or the top-bar shortcut in Retail, Both and the existing layout. Retail, Both and a workspace without a choice also have the floating Quick Bill button on a phone.
- 1Tap items from your Product Catalog to add them to This bill, and tap again to add one more. You can also search, or scan a barcode.
- 2For a cash payment, take the cash and use Save & print or Save only. For UPI, use Show UPI QR, confirm the money arrived in your UPI or bank app, then choose Paid · Save & print or Paid · Save only inside the QR window. This records UPI as the payment method.
- 3A completed sale is recorded as paid against Walk-in Customer, stock goes down, and Quick Bill stays open for the next sale. If it asks you to check the payment, open that invoice and resolve it before entering the same sale again.