
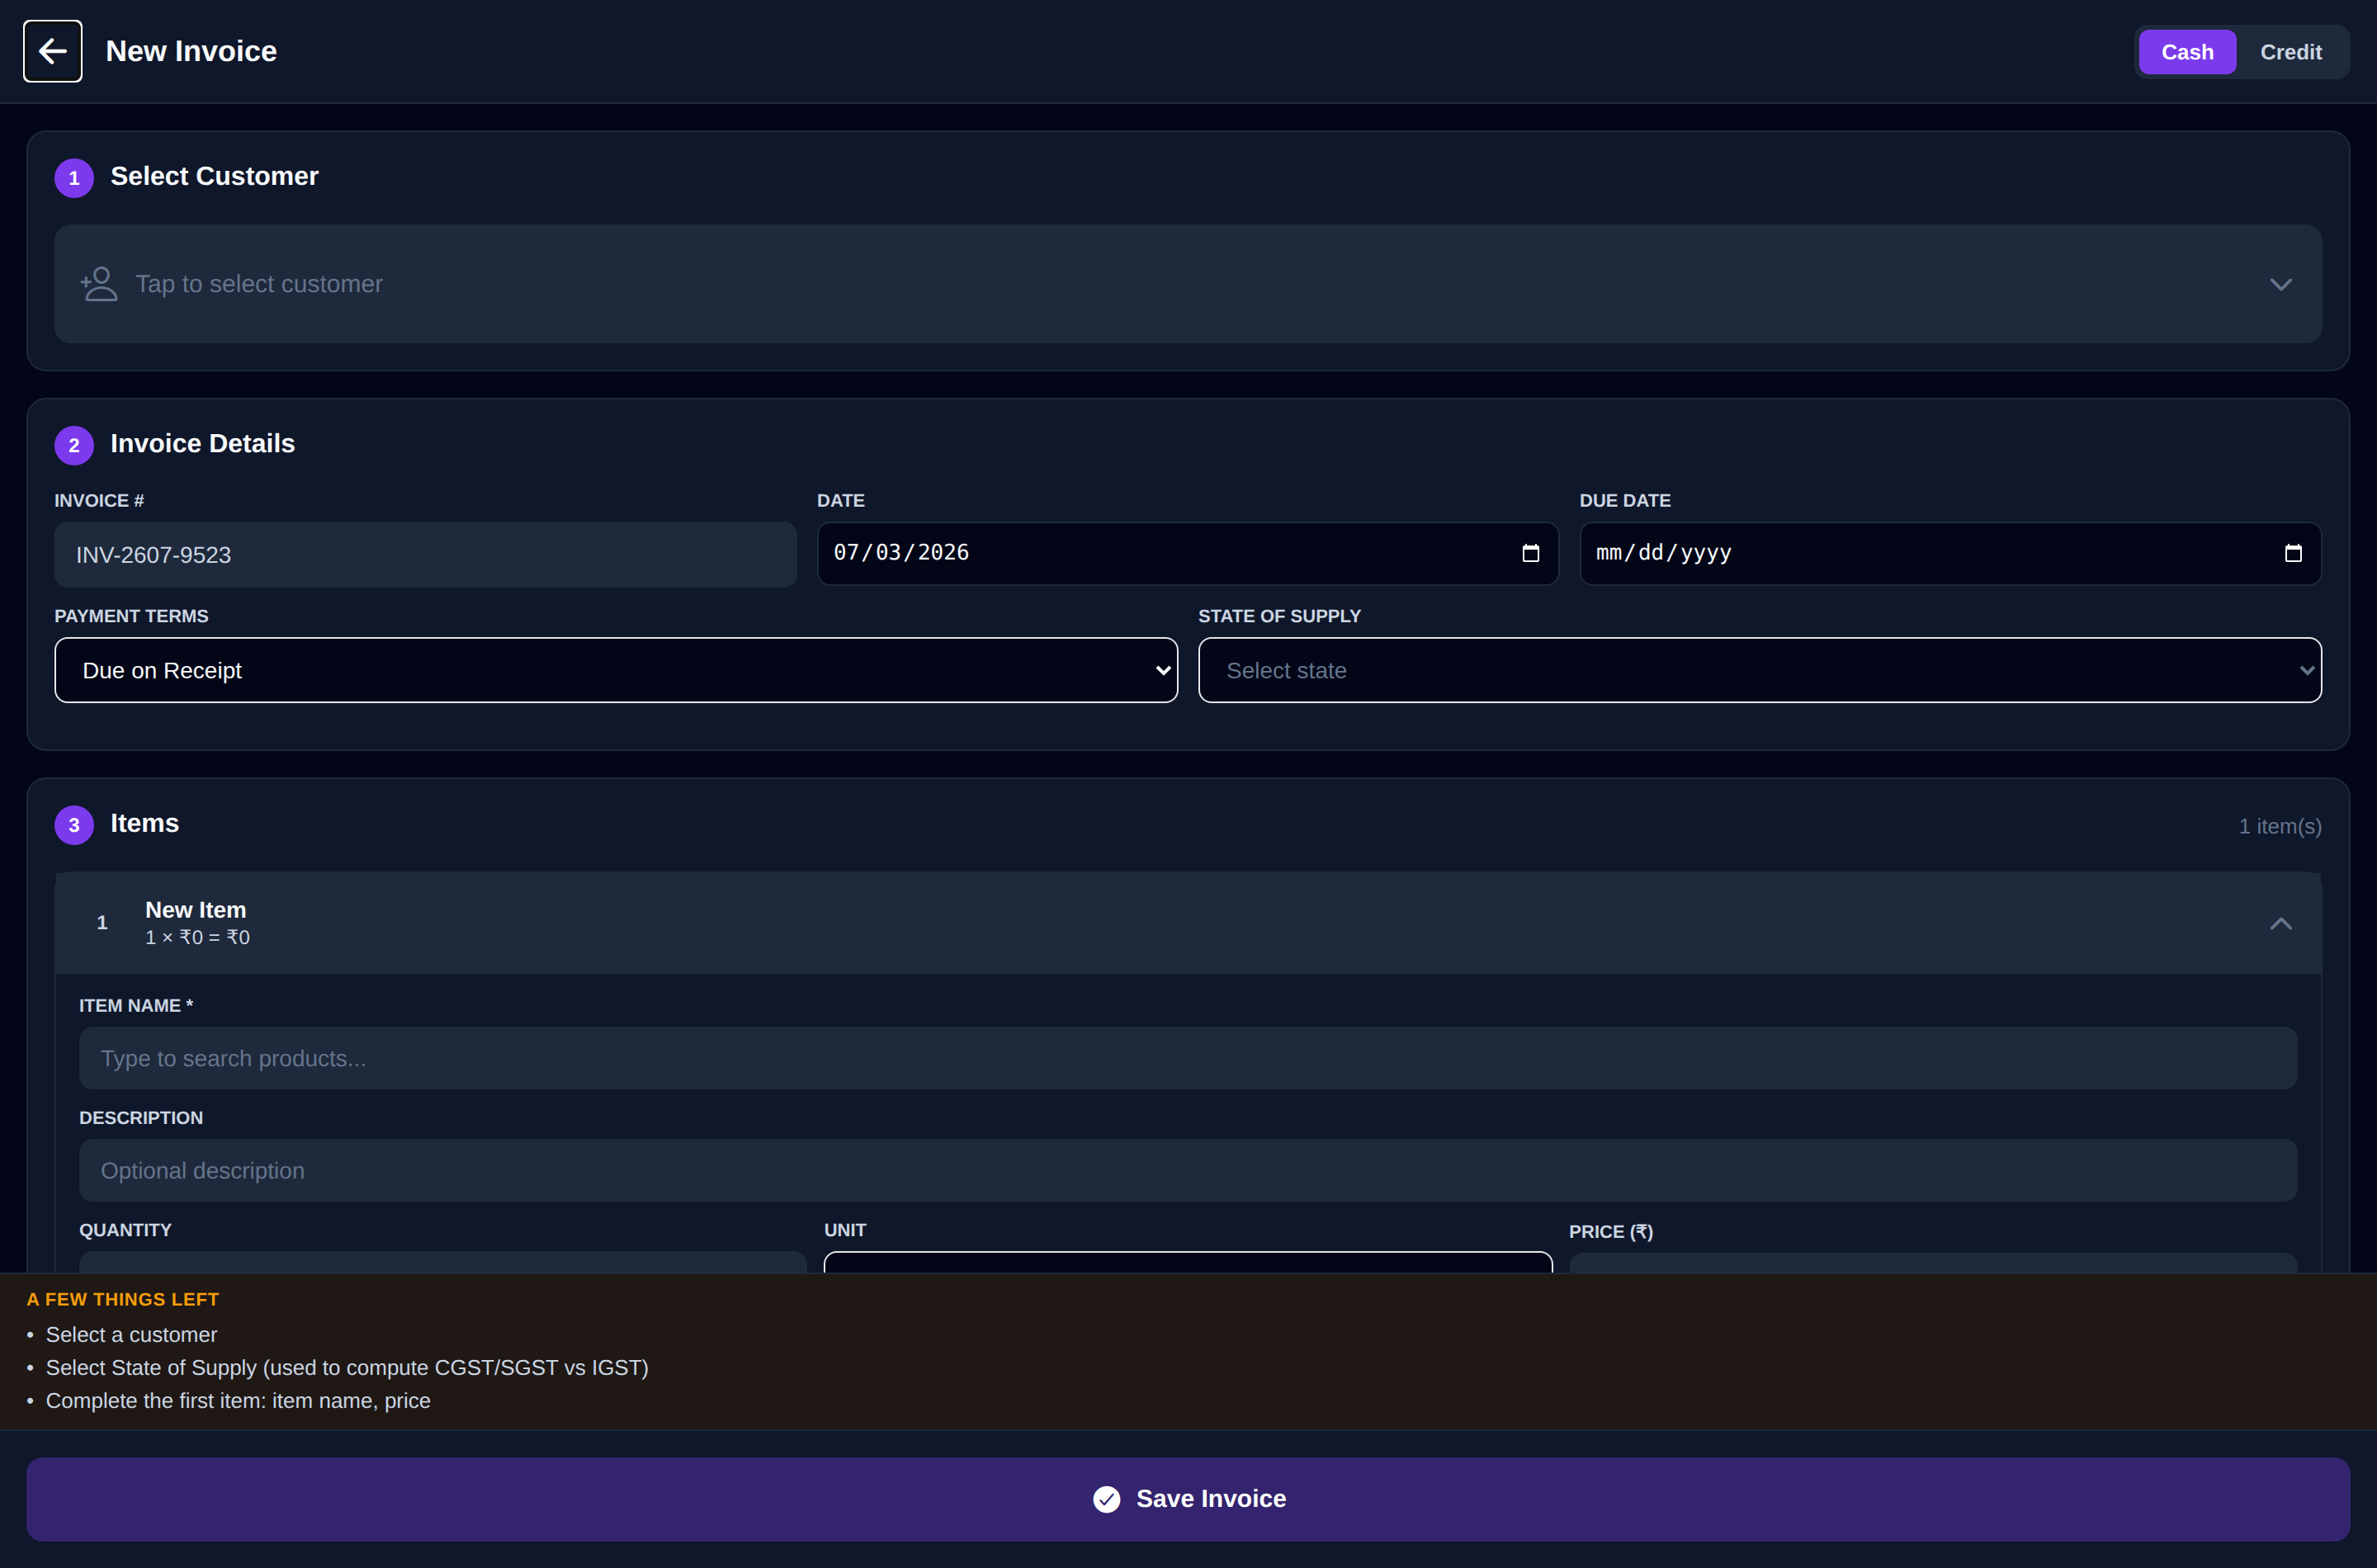
Click New Invoice in the top bar (on a phone, tap Invoice on the floating Quick Bill | Invoice button). The form opens beside the menu, with a Live preview of the invoice on a wide screen. Pick a customer, add your lines, and InvoiceKaro works out CGST + SGST or IGST for you.
You can also start an invoice from Create Invoice in the dashboard's Quick Actions, from New invoice on a customer (the customer is filled in for you), or from a scanned bill with Scan Bill.
1. Bill to
- 1Under Bill to, open Select or search customer and pick the customer. You can search by name, phone or GSTIN. The GSTIN box shows their GSTIN, or Unregistered (B2C) if they have none.
- 2New buyer? Click + New customer to add one without leaving the form. Only Name and Phone are needed; GSTIN and State are optional. Add the address, email and credit terms later from Customers.
- 3Place of supply fills in from the customer's state. Change it if you're supplying to a different state.
2. Invoice details
- Cash / Credit: the invoice's payment terms. Picking a customer who has a credit period switches it to Credit. Choosing Cash does not record a payment; saving this form still creates a draft. Use Quick Bill to record a paid counter sale.
- Invoice #: leave it blank and the invoice takes the next number in this financial year's series, such as
INV-2026-0030. The header previews the next number; the final number is assigned when the invoice is saved to your account. You can type your own instead (up to 16 characters). See Invoice statuses & numbering. - Invoice date, Payment terms and Due date: terms run from Due on Receipt to Net 90. A customer's saved credit period fills in Net terms and the due date for you. An empty due date reads On receipt.
3. Line items
Each line has Description, HSN/SAC, Qty, Rate, GST and Amount. Click Add item for another line, and ✕ to remove one. On a phone, tap a line to edit it and Done to close it.
- Pick from your catalogue: start typing in Start typing an item… and choose a product. Its rate, GST rate, unit and HSN/SAC fill in. If the customer has a price tier, that tier's price is used; see Price tiers.
- GST: choose the rate for each line, so one invoice can mix rates. The common slabs come first; special rates such as 3% are under More rates.
- HSN/SAC: if you enter a code, it must be 4, 6 or 8 digits.
- ⋯ on a line (on a computer): Unit, Description (optional), Discount % and, for serial-tracked items, the IMEI / serial numbers. See Serial numbers.
4. How GST is calculated
You never choose CGST + SGST or IGST by hand. InvoiceKaro compares the invoice's Place of supply with your business state, explains the result under Bill to, and shows Intra-state · CGST + SGST or Inter-state · IGST beside Line items:
| Place of supply | Tax applied |
|---|---|
| Same state as your business | CGST + SGST, split equally |
| Different state from your business | IGST, at the full rate |
5. Totals
The totals update as you type: Taxable value, then CGST and SGST (or IGST) for each rate, and the Total. Switch on Round off for a whole-rupee total. An invoice that charges GST prints as a TAX INVOICE. If every line is at 0%, it prints as an INVOICE.
6. Notes, template and what shows on the PDF
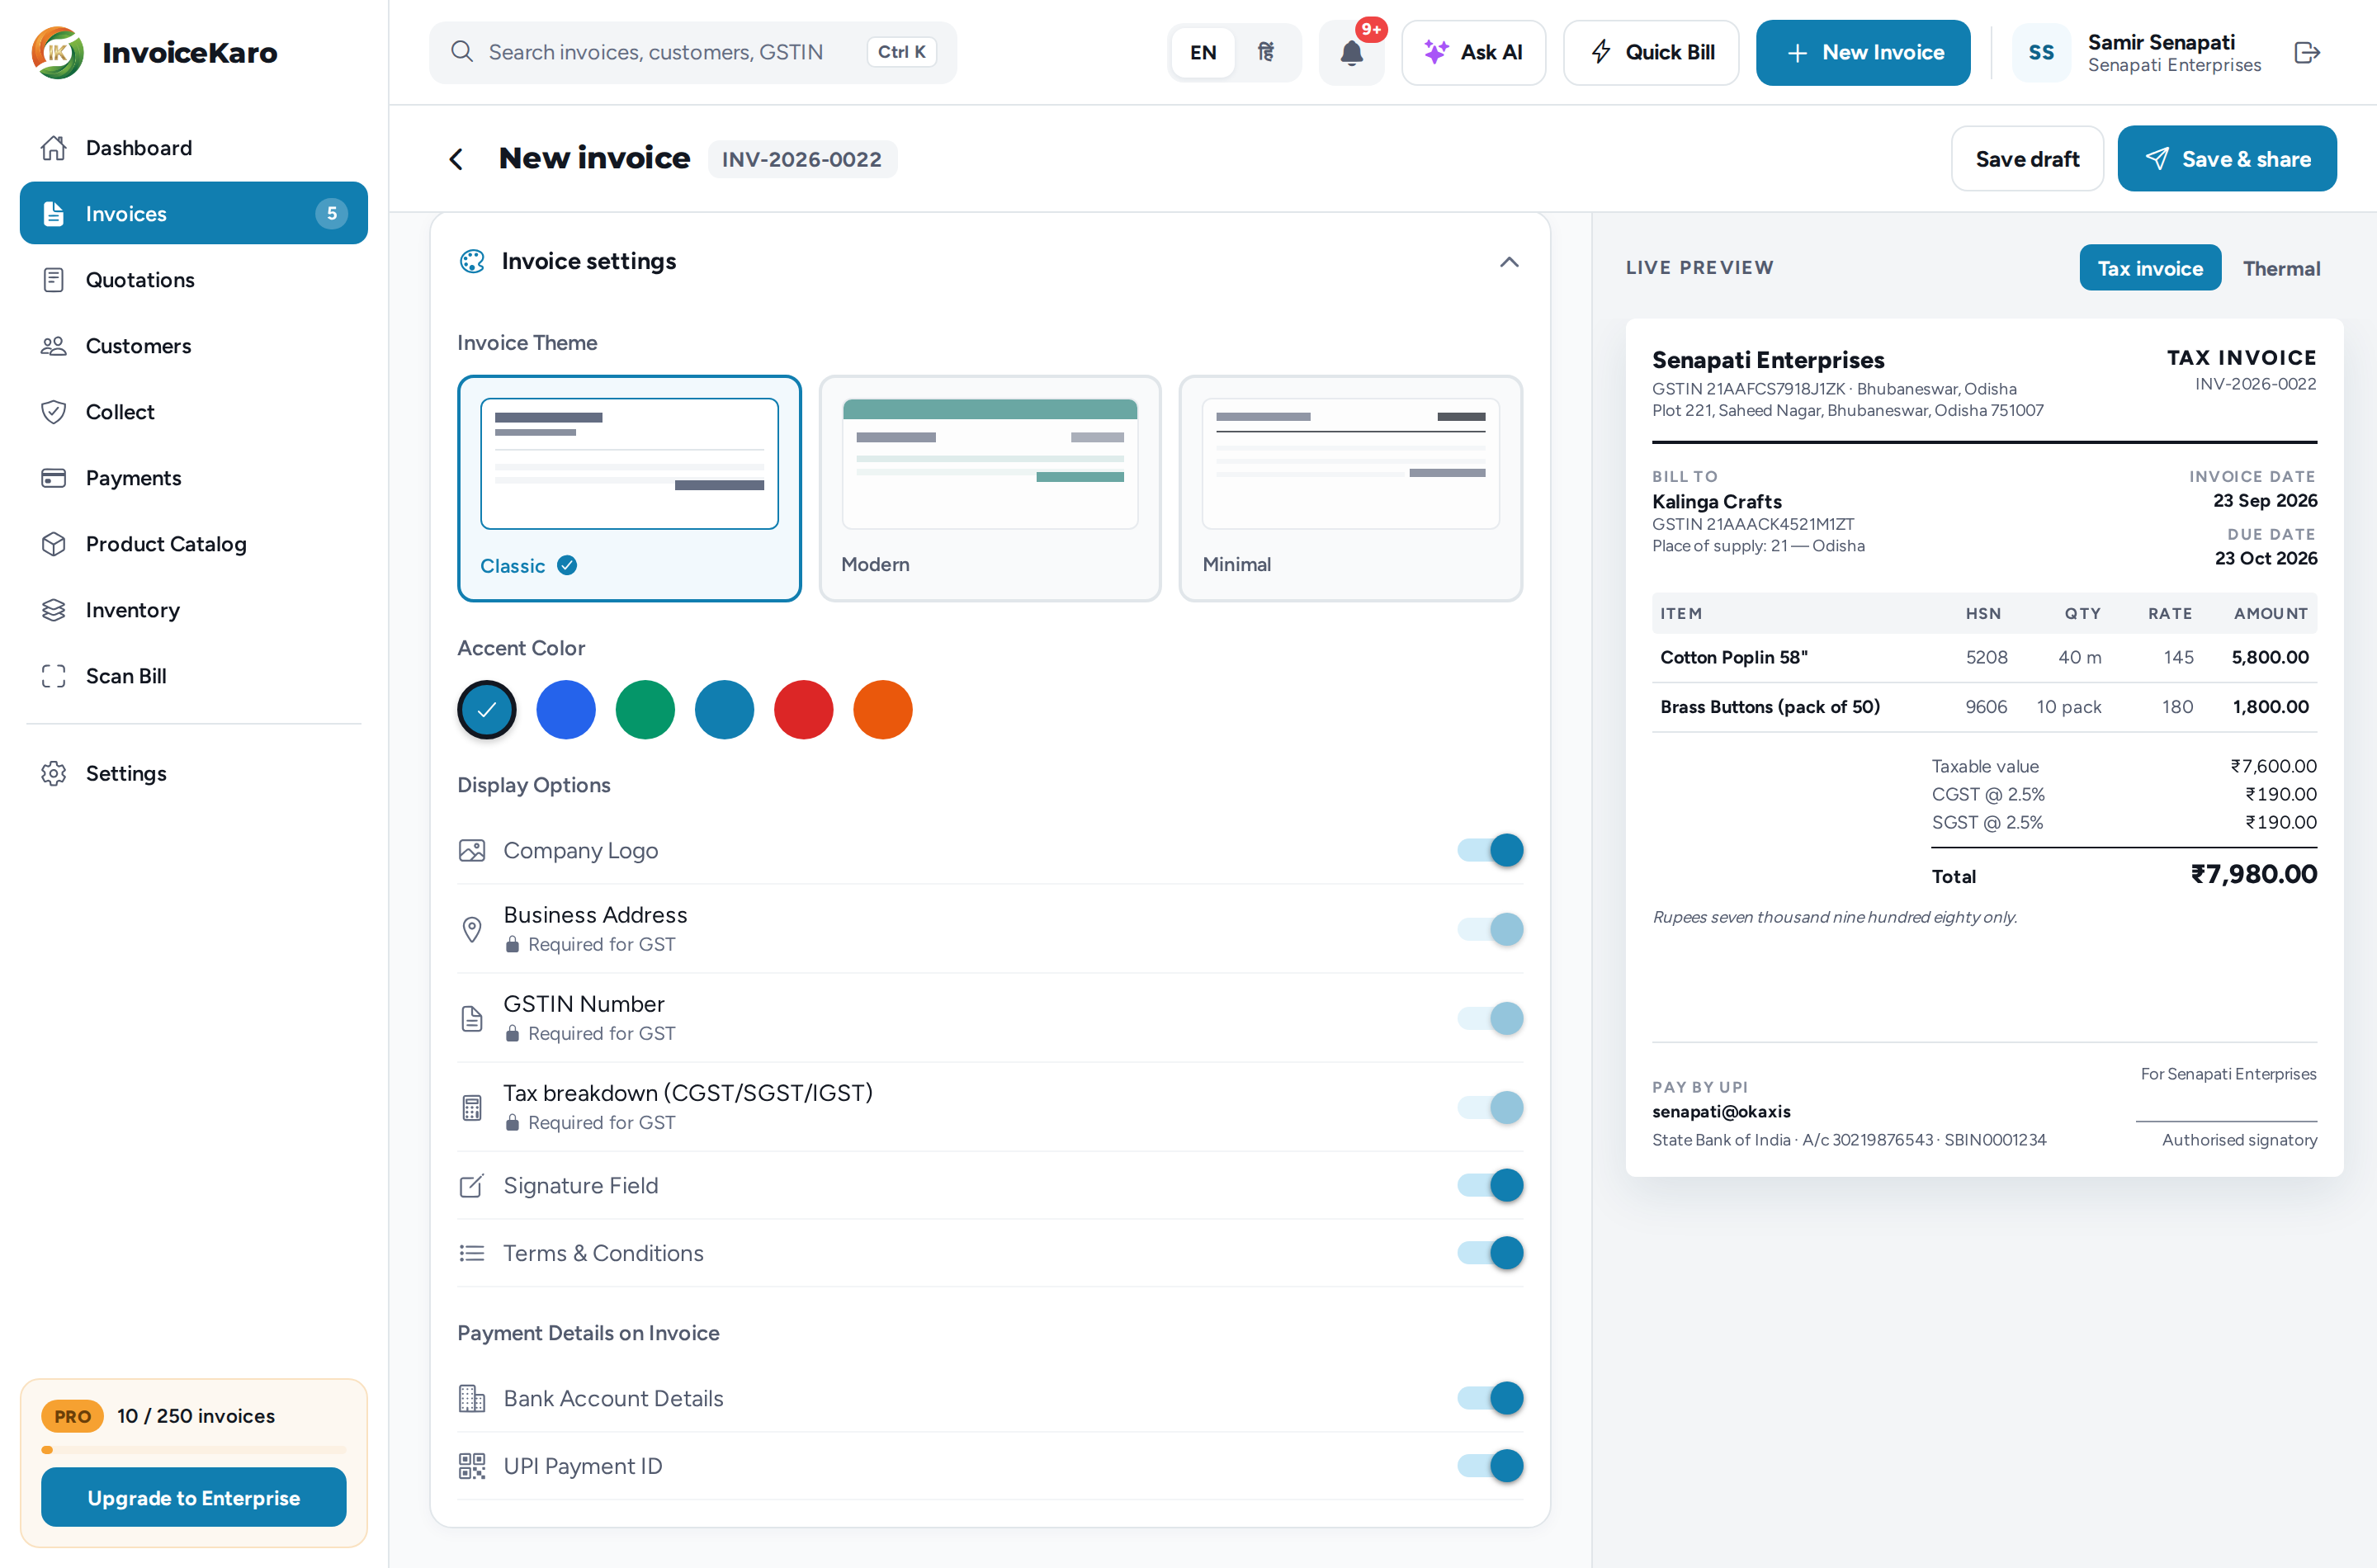
Below the totals, open Notes / terms to add notes or conditions, and Invoice settings to style this invoice:
- Invoice Theme: Classic, Modern or Minimal. Your default comes from Settings → Invoice template; see Appearance & Templates.
- Accent Color: the template's own colour, or one of five others.
- Display Options: Company Logo, Business Address, GSTIN Number, Tax breakdown (CGST/SGST/IGST), Signature Field and Terms & Conditions.
- Payment Details on Invoice: Bank Account Details and UPI Payment ID, so customers can see how to pay you. Add them first in Payments & UPI.
7. Live preview
On a wide screen, the Live preview beside the form shows the invoice as you type. Switch it between Tax invoice (the A4 layout) and Thermal (the till-roll receipt). In a narrower window, click Preview in the header to see it, and Edit to go back to the form.
8. Save
- 1If the header shows something like 3 things left, click it to see what's missing: a customer, the place of supply, or a complete first item (name, quantity and price).
- 2Save draft keeps the invoice as a draft that you can come back to and edit.
- 3Save & share saves the draft and opens the sending options straight away. See Sending invoices & reminders.