
Customers is your customer book. Save someone once, with their GSTIN, state, payment terms and how they like to be contacted, and pick them on every invoice, quote and reminder. The list shows what each customer owes you.
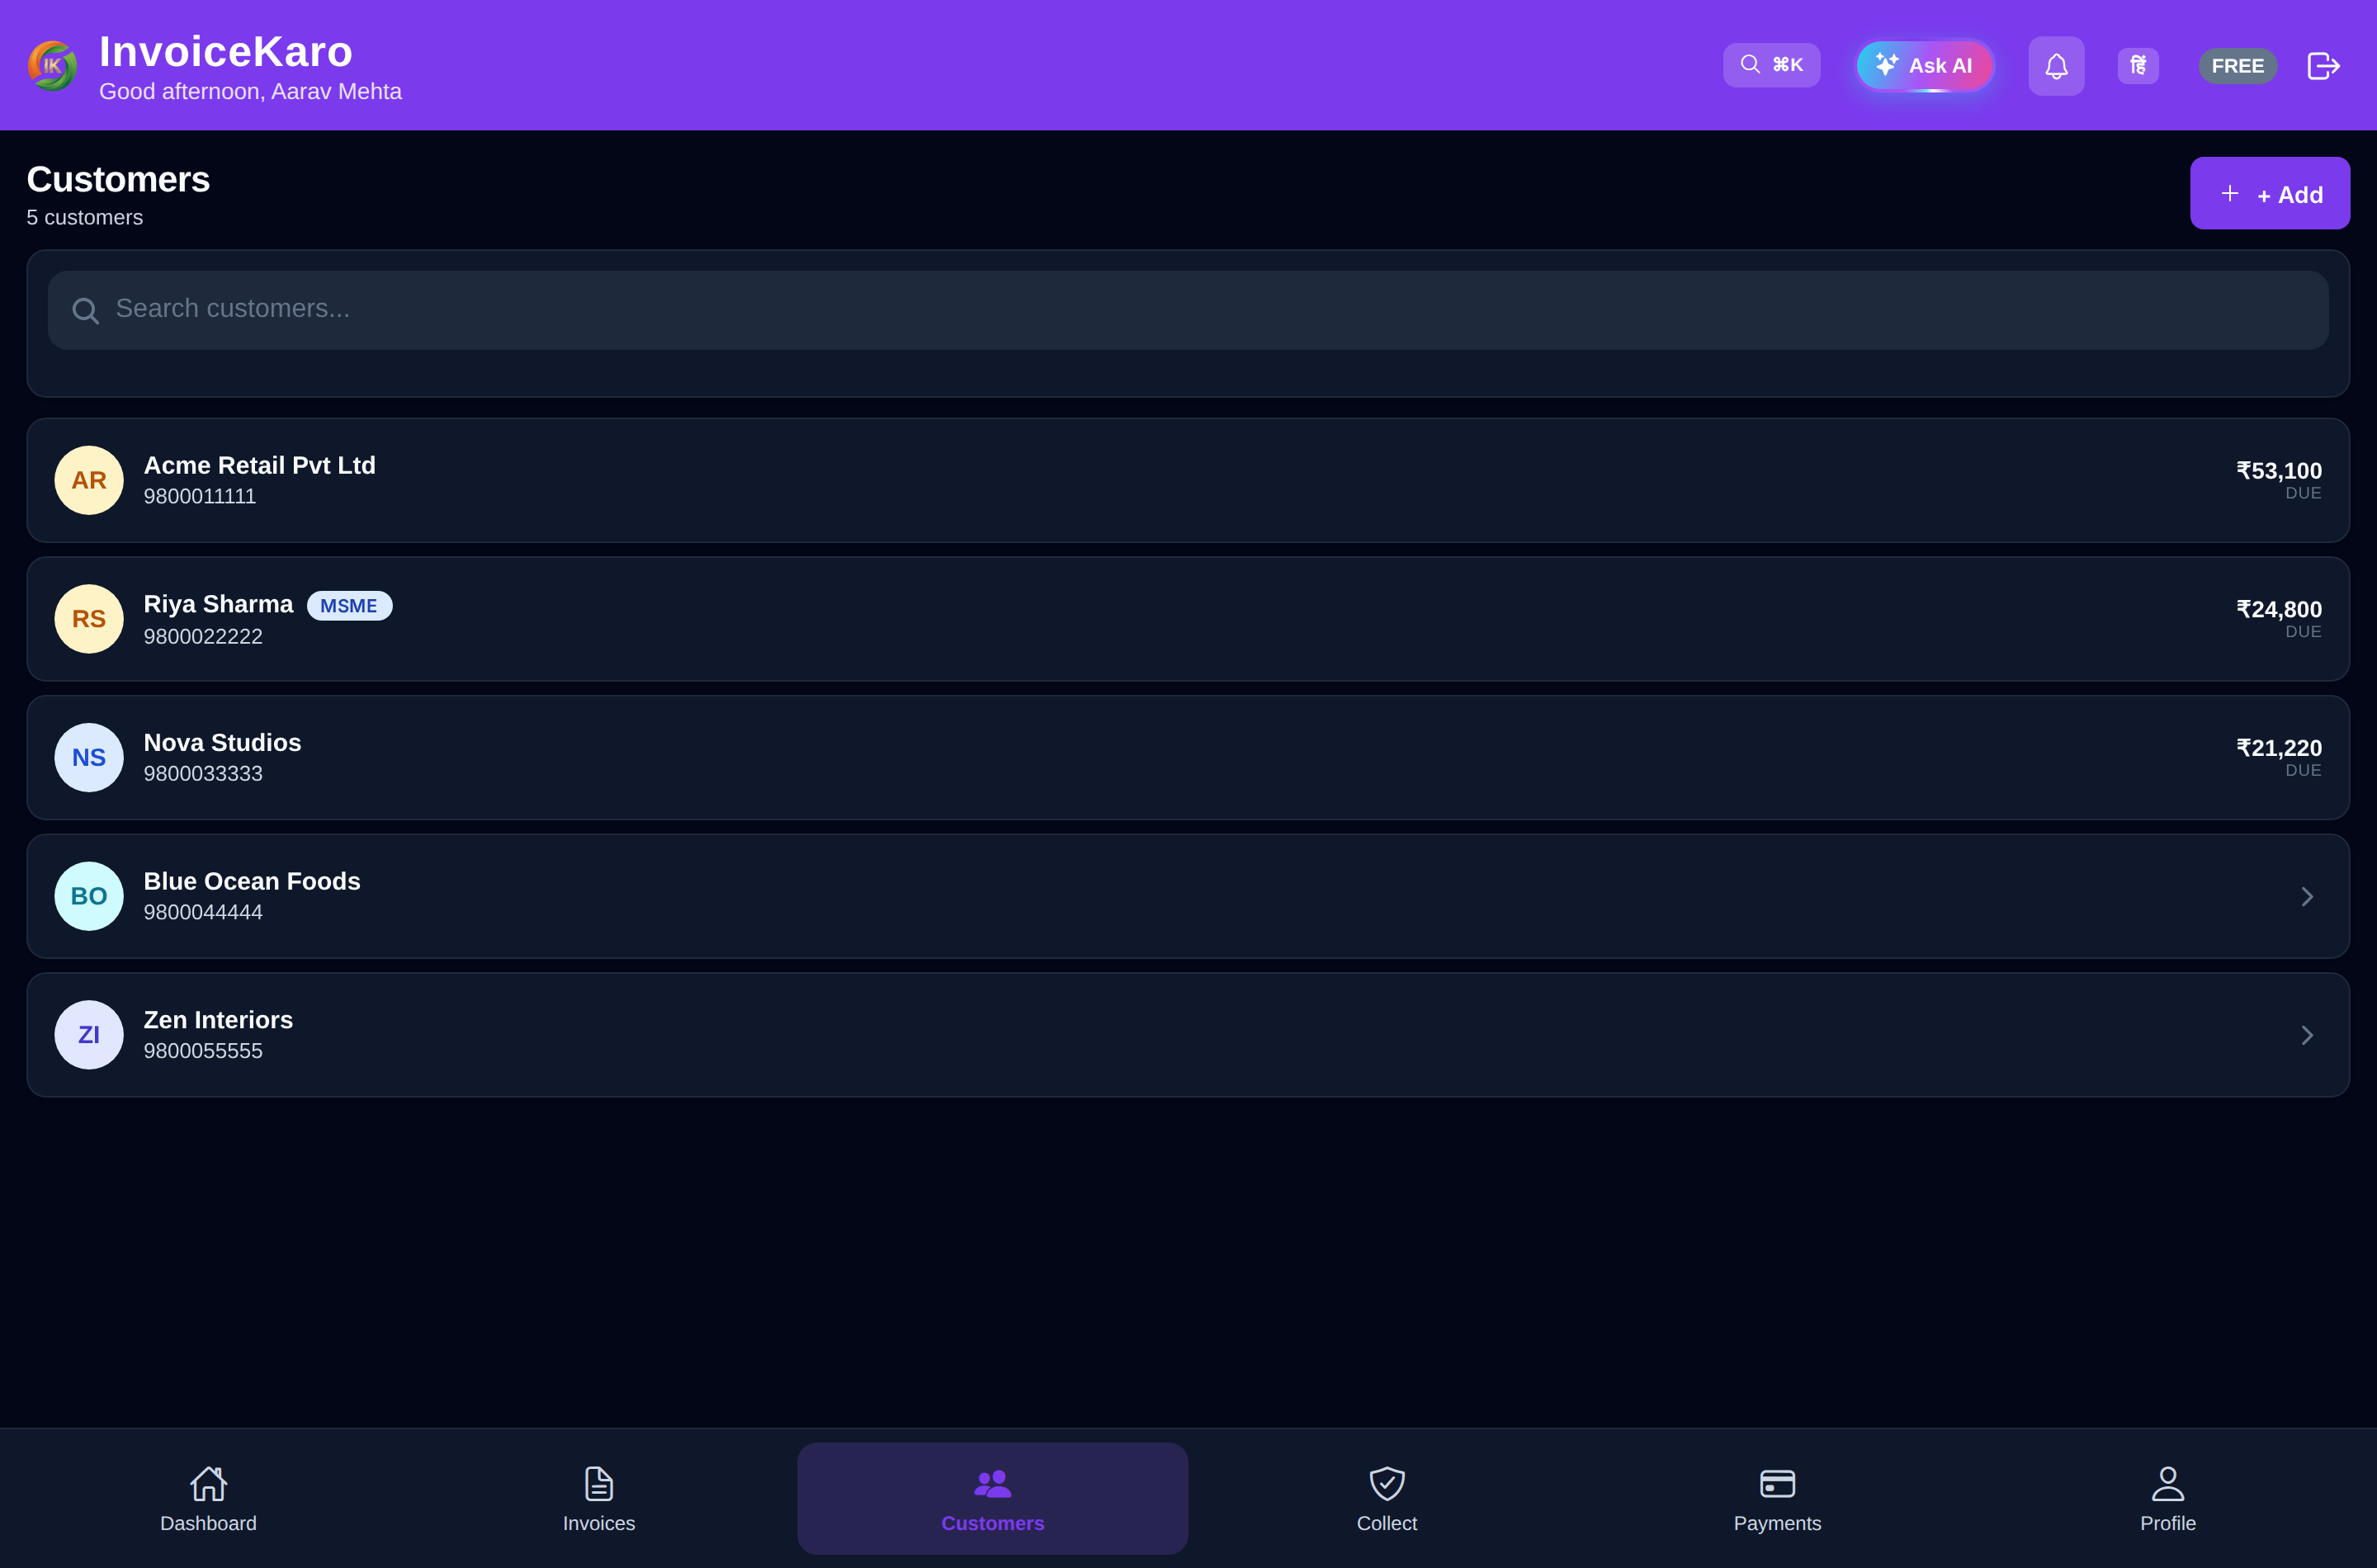
The Customers list
- Tiles at the top: Total customers, Owed to you and Avg. days to pay.
- Search: by name, phone, GSTIN or state.
- On a computer: a table of Customer, GSTIN, Invoices, Outstanding and Last billed. Click the Customer, Outstanding or Last billed header to sort by it.
- On a phone: cards showing what each customer owes and how many invoices are pending. Sort offers Highest outstanding, Lowest outstanding, By name and Recently billed.
- Walk-in Customer (marked System) holds your Quick Bill counter sales. It's created for you, and its name can't be changed.
A customer's details
Click a customer (on a phone, tap the card) to see their details. On a computer they open on the right of the list:
- New invoice: opens the invoice form with this customer already picked.
- Remind: reminds them about their unpaid invoices on WhatsApp and email (the button shows the count, such as Remind (2)).
- Outstanding and Billed for the financial year.
- Details: GSTIN, phone, email, state and payment terms.
- Customer portal: Copy portal link gives a private link where this customer can see their invoices and pay online. Revoke portal links stops every link you've shared with them at once. Share a link only with that customer.
- Invoice history: each invoice with its status. Click one to view its PDF; when there are more, View all opens them in Invoices.
Add a customer
- 1Click New customer on the Customers page, or Add Customer in the dashboard's Quick Actions.
- 2Enter the Customer name and Phone number. Both are required.
- 3Add their Email and GSTIN if you have them. A valid GSTIN fills in the State for you.
- 4Check the State: it decides between CGST + SGST and IGST on their invoices.
- 5Set Payment terms (days, 0–365). It's 30 unless you change it, and 0 means due on receipt.
- 6Optionally add an Address, a Photo (Camera or Gallery), a Price tier, MSME / Udyam details and Notification preferences.
- 7Click Add customer. They're now ready to pick on any invoice.
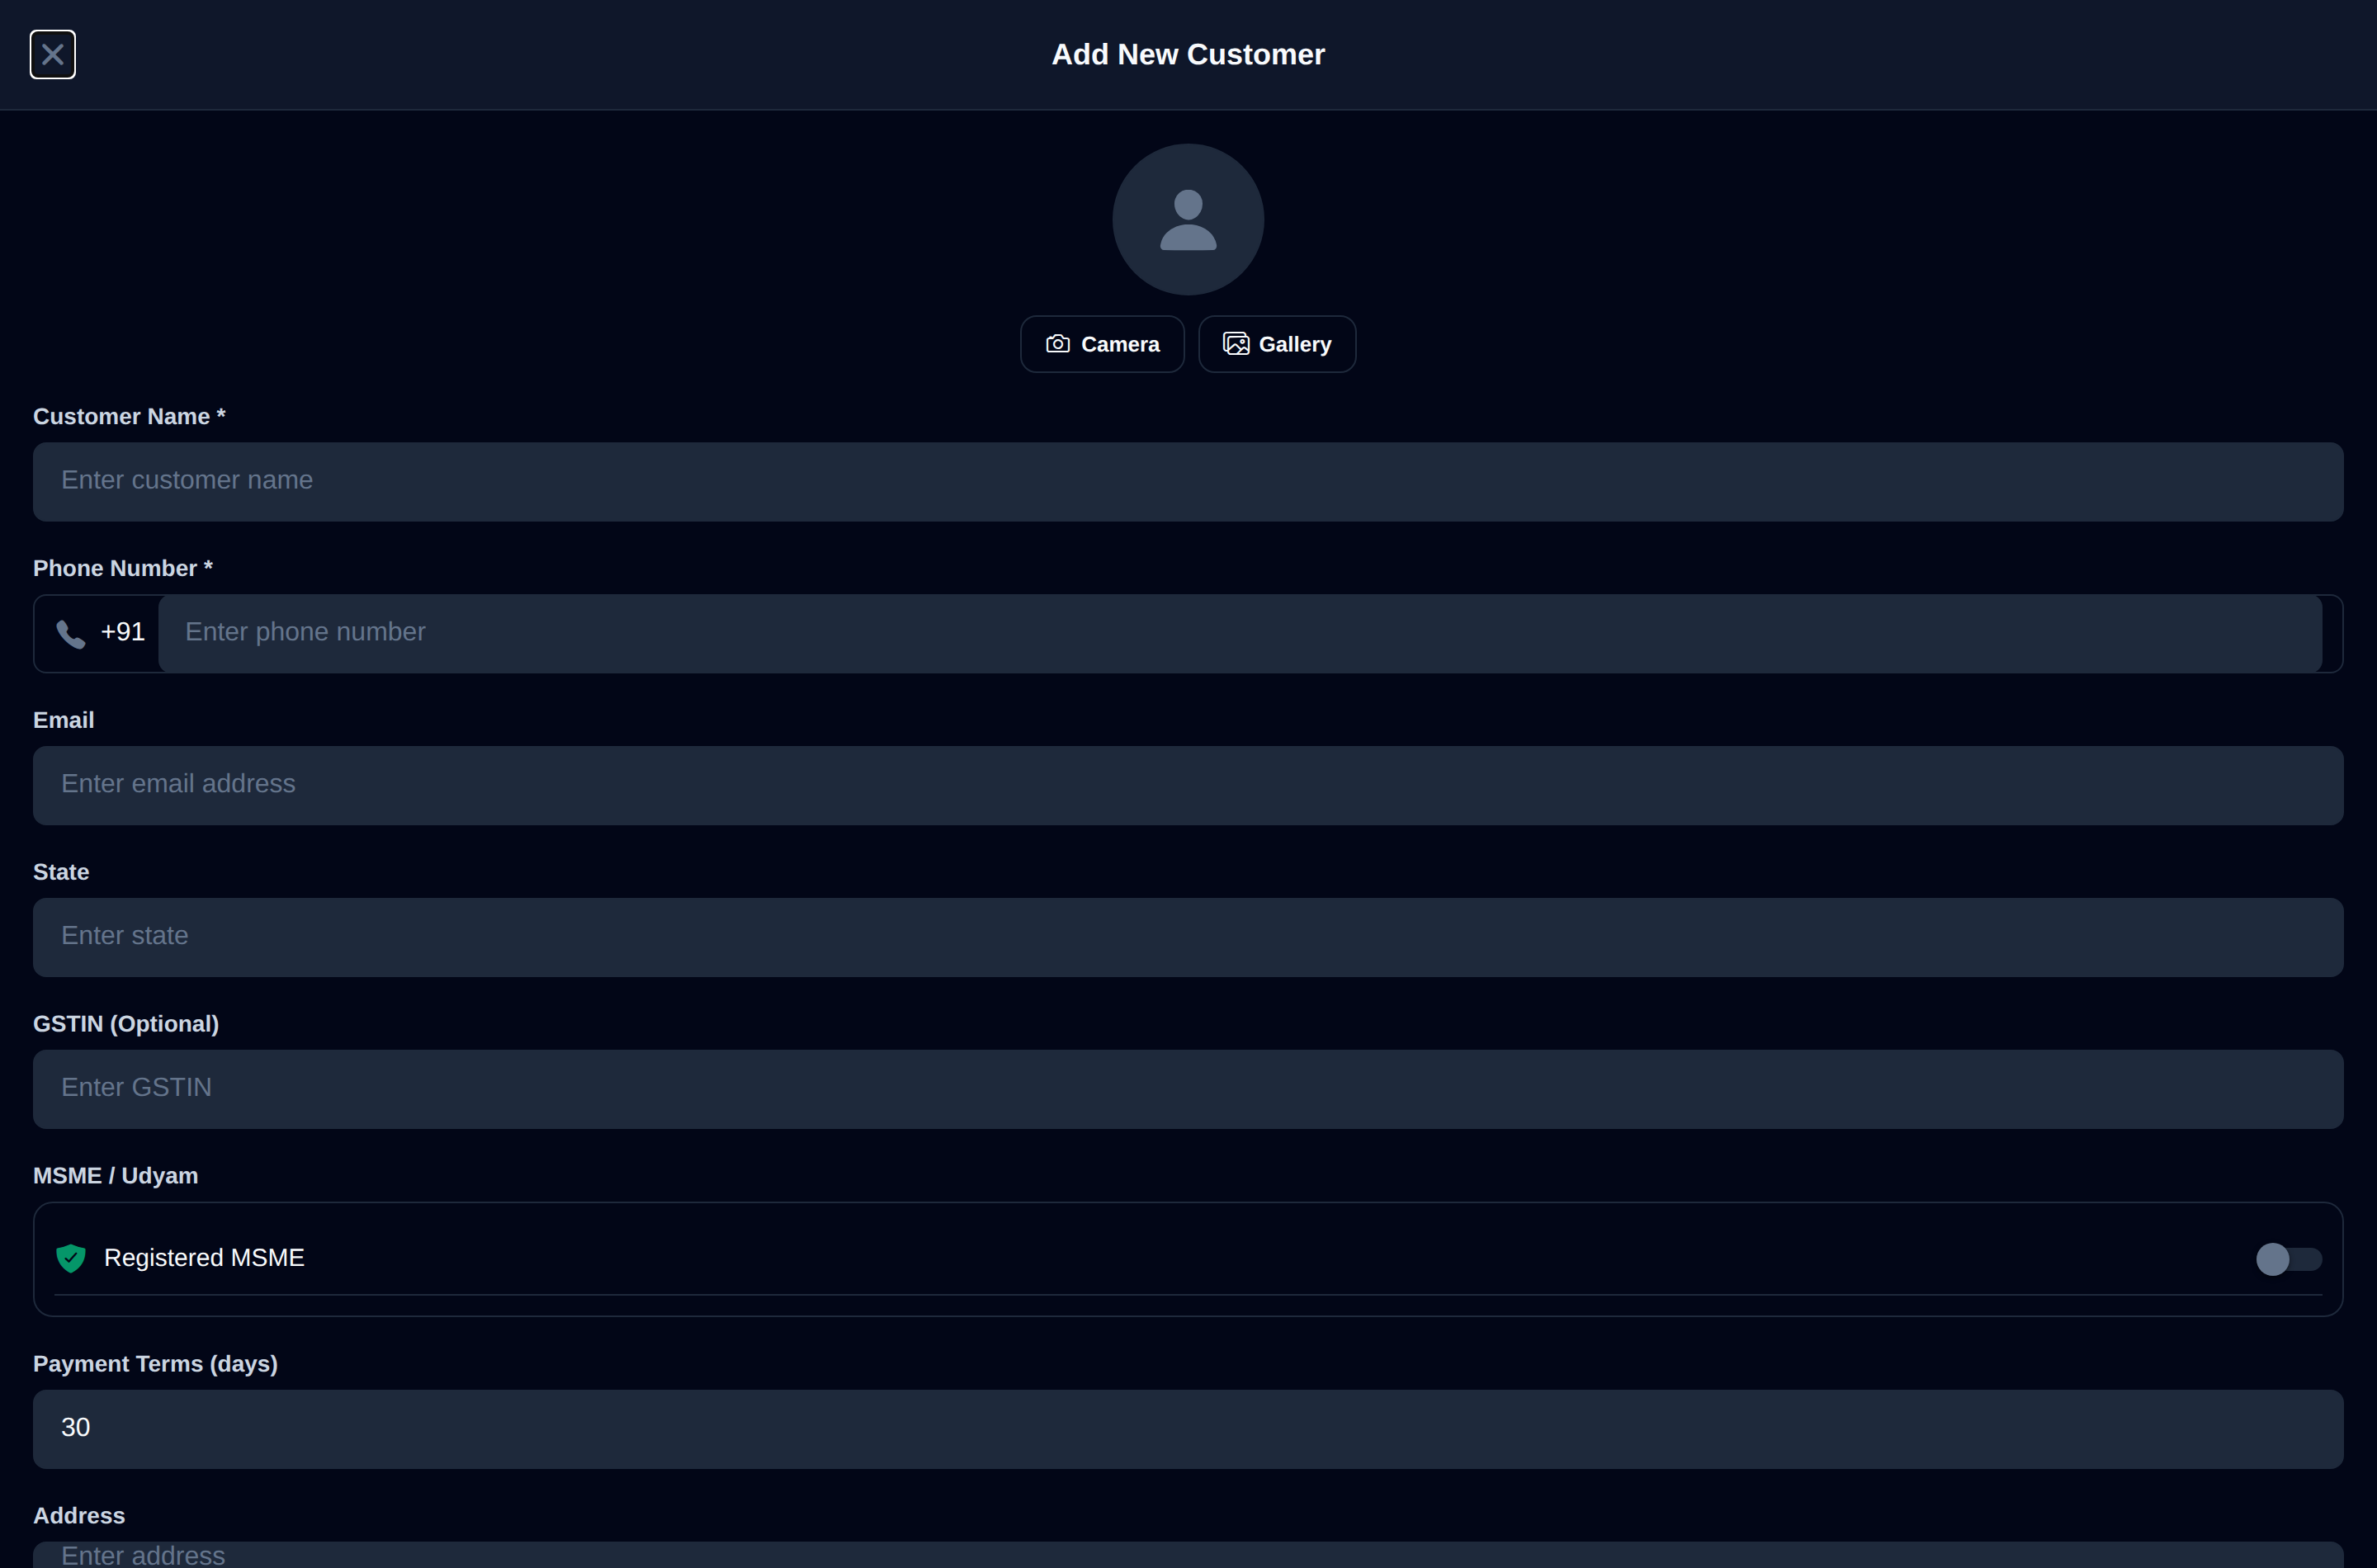
What each field does
| Field | Why it matters |
|---|---|
| Customer name, Phone number | Required. The phone is used for WhatsApp and SMS. |
| Needed to send invoices and reminders by email. | |
| GSTIN | Optional, for GST-registered buyers. It fills in their state. |
| State | Becomes the invoice's place of supply, which decides CGST + SGST or IGST. |
| Payment terms | Sets Net terms and the due date on their new invoices, and switches them to Credit. |
| Address | Printed on their invoices. For a buyer without a GSTIN, a GST invoice of ₹50,000 or more needs it. |
| Price tier | Default, Wholesale, Retail or Shop. Their invoices use that tier's price from your catalogue, or the normal price if none is set. See Price tiers. |
| Photo | A quick visual cue in your list. Keep it under 1.5 MB. |
| MSME / Udyam | Switch on Registered MSME to record their Udyam number and MSME category. |
| Notification preferences | Send SMS, Send WhatsApp and Send Email: the channels used for their invoices and reminders. |
MSME / Udyam details
Switch on Registered MSME to record the customer's Udyam number and MSME category (micro / small). The details are kept on the customer and printed on Projects evidence packs. For what the MSMED Act means for payment deadlines, see MSME protection.
Notification preferences
Each customer has Send SMS, Send WhatsApp and Send Email switches. When you send an invoice or a reminder, InvoiceKaro only uses the channels that are switched on.
Edit or delete a customer
Open the customer and click the pencil (Edit customer), change what you need and click Save changes. Changes apply to new invoices; invoices already issued keep the details they were issued with.