
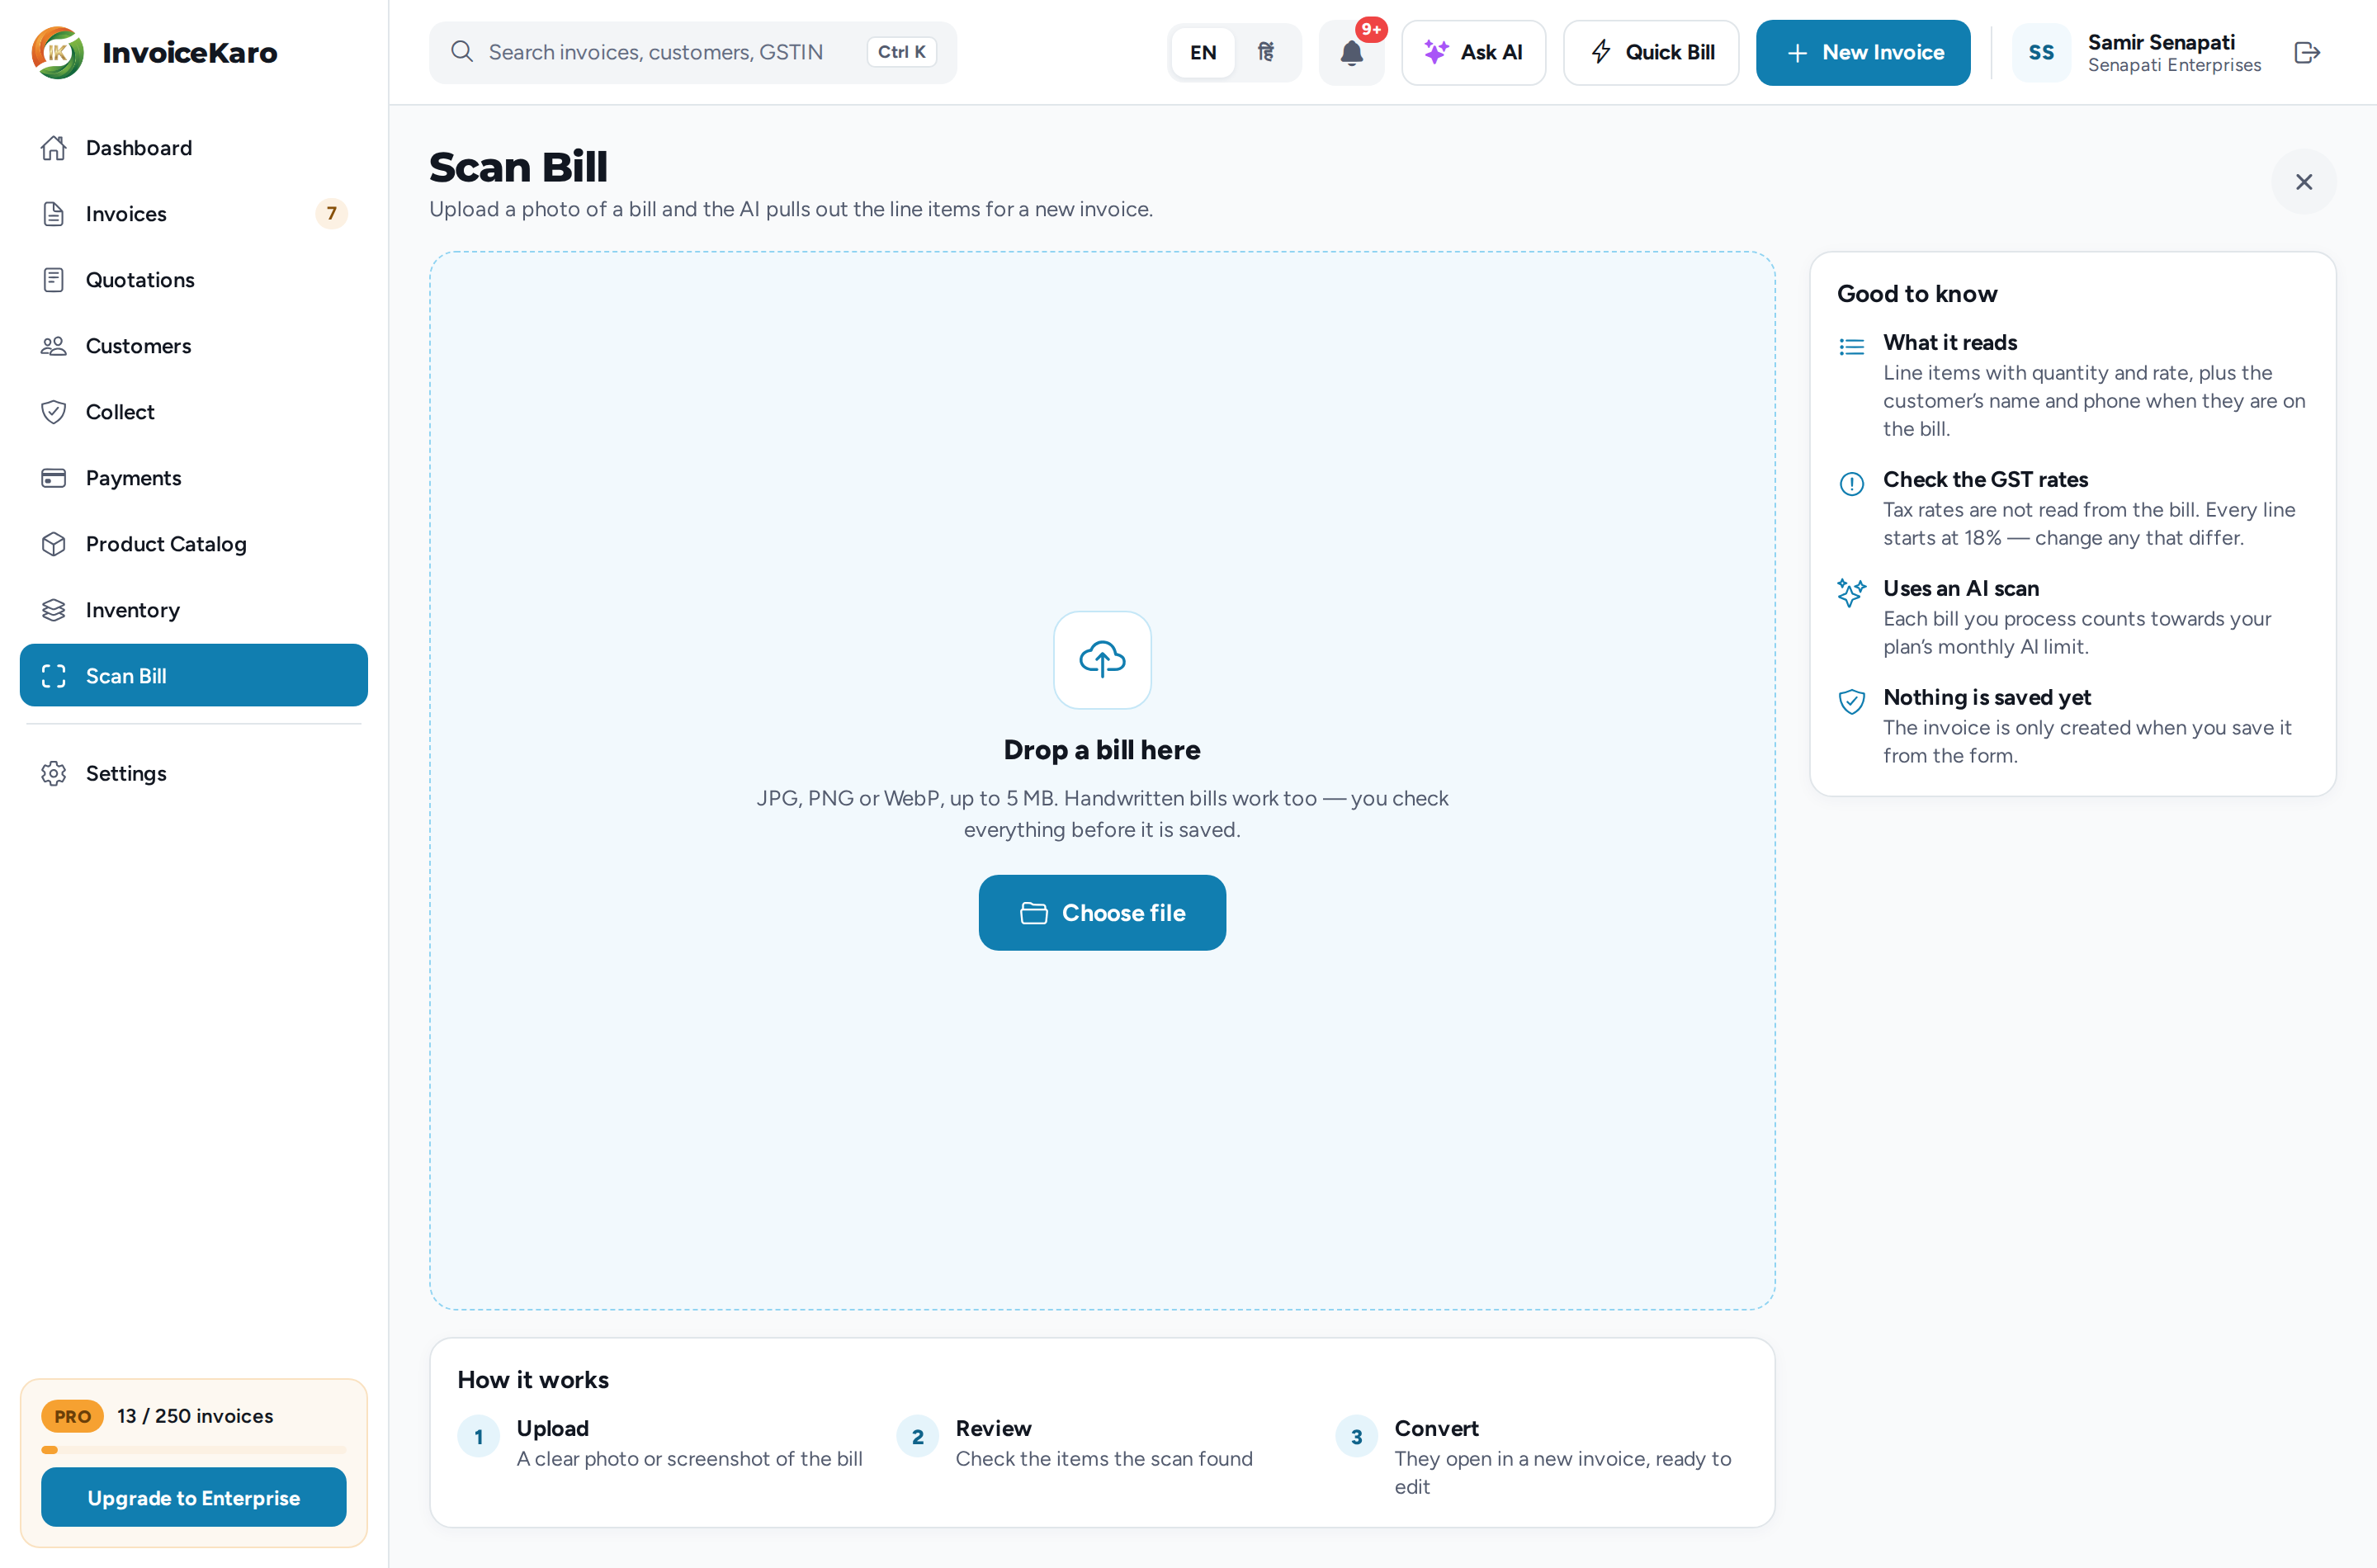
Scan Bill turns a photo of a paper bill into entries you don't have to type. Upload it, check what the AI read, and choose what it is: stock you bought, a running cost, or a sale to bill a customer for. Nothing is saved until you save the form it opens.
Open Scan Bill
- On a computer: open More → Scan Bill, or the direct Scan Bill menu item when your layout includes it. A workspace without a chosen type keeps the dashboard Scan Bill tile.
- On a phone: open More → Scan Bill when your role allows it. A workspace without a chosen type also has the Scan Bill tile under Quick Actions on Home.
invoicekaro.com/app
Note
Reading a bill with AI needs internet and available AI access on your plan. During an outage, use prepared Offline billing to enter a new draft or cash sale manually.
Scan a bill
- 1Add the image — On a computer, drag it onto Drop a bill here or click Choose file. On a phone, tap Take photo or Choose from device. Use a JPG, PNG or WebP image up to 5 MB. You can try a handwritten bill, but check every extracted value carefully.
- 2Check the photo — Make sure the whole bill is in frame and readable, then tap Process bill, or Use another image to swap it.
- 3Wait a moment — Reading the bill… usually takes 10–20 seconds.
- 4Review what it found — Review scanned bill shows the seller and their GSTIN, the buyer, the bill number and date, each item with its quantity, rate and amount, the totals, and how confident the scan is. Click Edit to correct anything, then Done.
- 5Choose what it is — Under Save this bill as, pick Purchase bill, Expense or Sales invoice.
invoicekaro.com/app
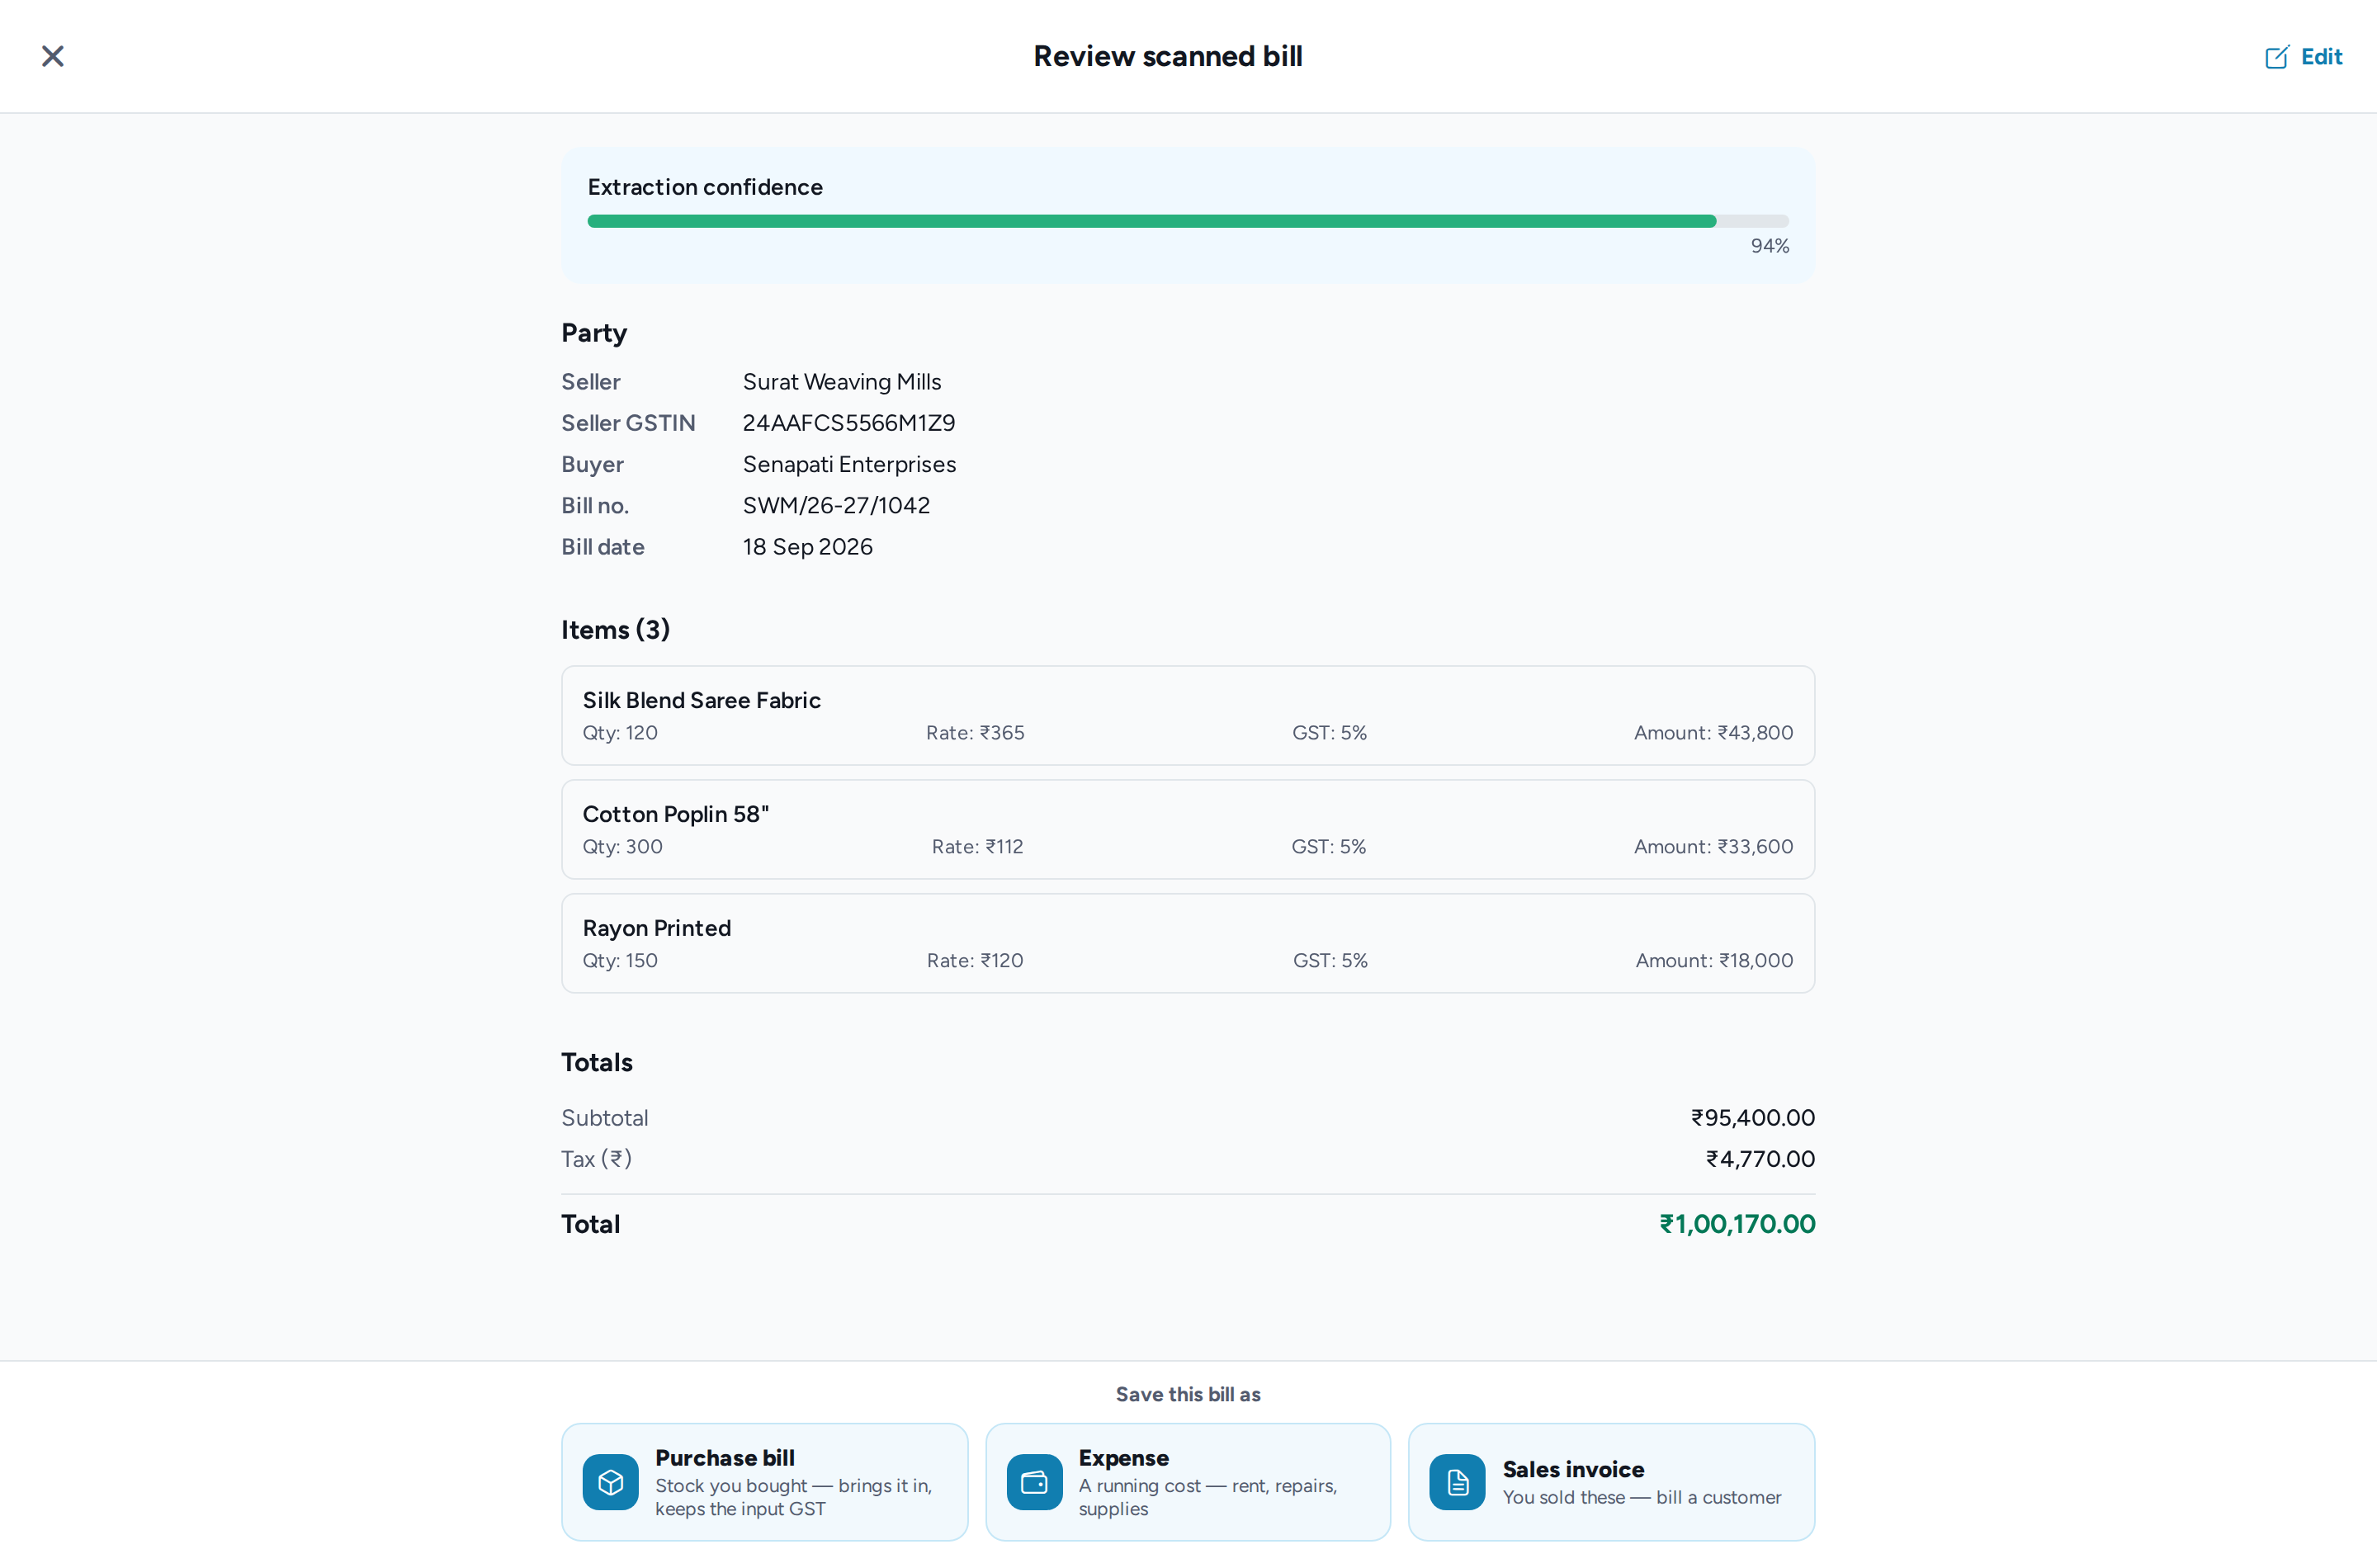
What each choice does
| Save as | Use it for | What opens |
|---|---|---|
| Purchase bill | Stock you bought. It brings the stock in and keeps the input GST. | Inventory → Purchases with a new bill filled in: supplier, bill number, date and lines. Check it, pick the supplier and save. See Purchases. |
| Expense | A running cost such as rent, repairs or supplies. | Inventory → Expenses with the amount before GST, the GST (which you can claim back), the date and the reference filled in. See Expenses & profit. |
| Sales invoice | Things you sold, to bill a customer. | New invoice with the lines filled in. If the buyer's phone or name matches a saved customer, they're picked for you. |
Check the GST rates
Check the GST rate on every line before you save. The scan may not read tax rates, and a line without one starts at 18%.
Note
Each bill you process counts towards your plan's monthly AI limit. See Plans & billing. Purchase bill and Expense appear only if your role can record purchases and expenses.
Is anything saved when I scan a bill?+
No. Scanning only fills in a form. The purchase, expense or invoice is created when you save that form.
The scan missed a line or misread a number.+
Click Edit on Review scanned bill and fix it before you choose what to save it as. You can also correct everything in the form that opens.
I can't see Scan Bill.+
Scan Bill uses AI, so it's hidden for team roles without AI access. Ask the account owner.